The ergo module in AVIX
Users familiar with the “Method” module in AVIX will see that the outline in the Ergo perspective (module) is very similar.
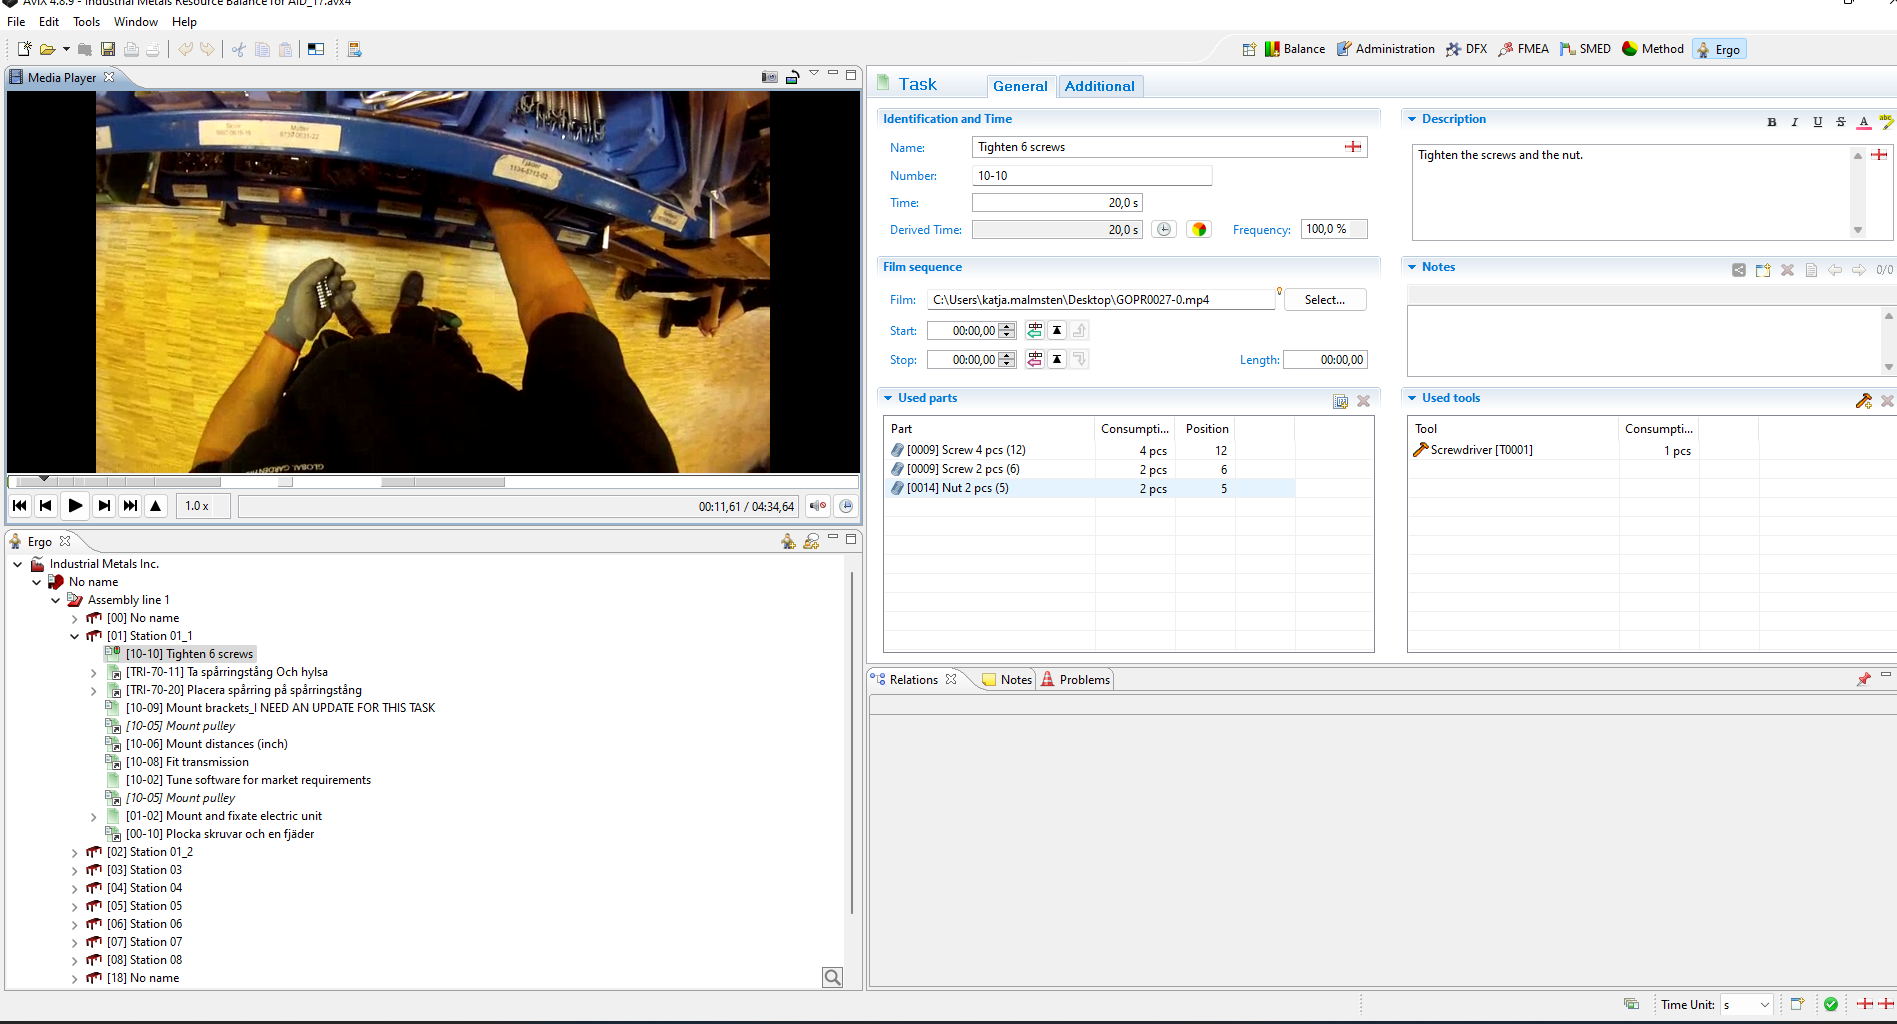
When AVIX is running you switch to Ergo perspective (module) by pressing on the Ergo-icon . The default appearance of AVIX Ergo looks like below.
The different views or windows will be explained throughout this guide, but let’s start with a quick overview of the view outline:
-
The Ergo view in the lower left corner is where your plant structure with the assembly process tasks are presented (just like in AVIX Method). The only difference is that the Physical and Psychosocial situations of AVIX Ergo are created and organized here as well.
-
Relations display related information for the objects that are selected in the Ergo view. This is where attached Documents and written Notes are presented.
-
Media Player is where the related video is being visualized. In addition to process tasks, video capabilities are also possible for the Ergo situations.
Generating physical Ergo situations from an existing Method analysis
If an AVIX Method analysis has been performed, it is very convenient to “generate” physical situations based on the Method analysis. This will render a “skeleton” in the form of Physical situations, leaving the assessment of the experienced strain to the user (or group of users).
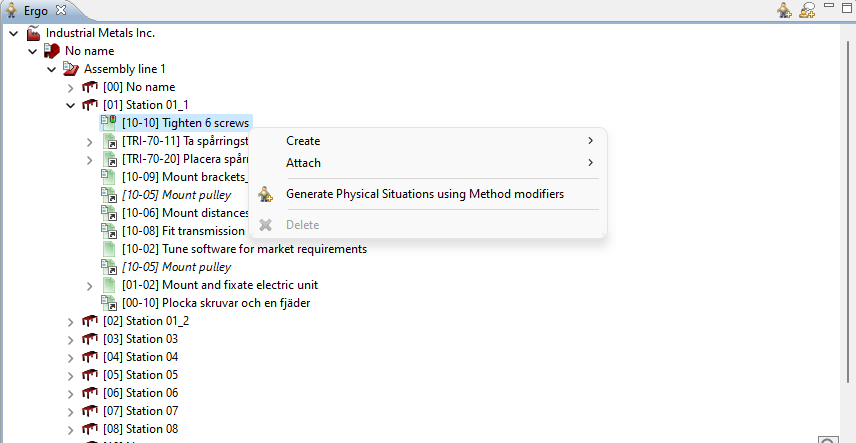
Look at the example below. Our starting point is an existing Method analysis, where we have numerous occurrences of Bending, Stretching or Twist registered at the Operations level. When we select a Workstation for instance, and select “Generate Physical situations...” on the context menu, the situations will be created for us.
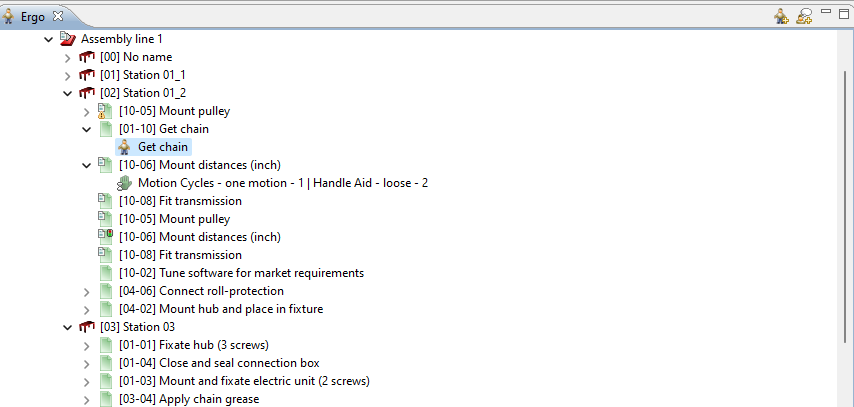
The result after performing the action will be that one physical situation is created for each Operation containing anything considered “non-ergonomic”. Note that if video clips were used in the Method analysis, the physical situation will “inherit” the video clip as well as the start/stop of the operation.
Fine tuning the generation of physical situations
If opening the Preferences dialog in AVIX (Window->Preferences...) and browsing to the Ergo preferences (AVIX Preferences->Ergo settings), the function of this generator can actually be controlled. Additional mechanisms are easily added upon request (e.g “Operation with UOF exceeding 2”
Creating physical situations from scratch
It is of course also possible to create the situations “from scratch”, without an existing Method analysis. Simply create the required levels (at least one Workstation is required), and subsequently create the situations.
Physical situations are valid both for Workstations and for Process Tasks.
Performing a Physical situation analysis
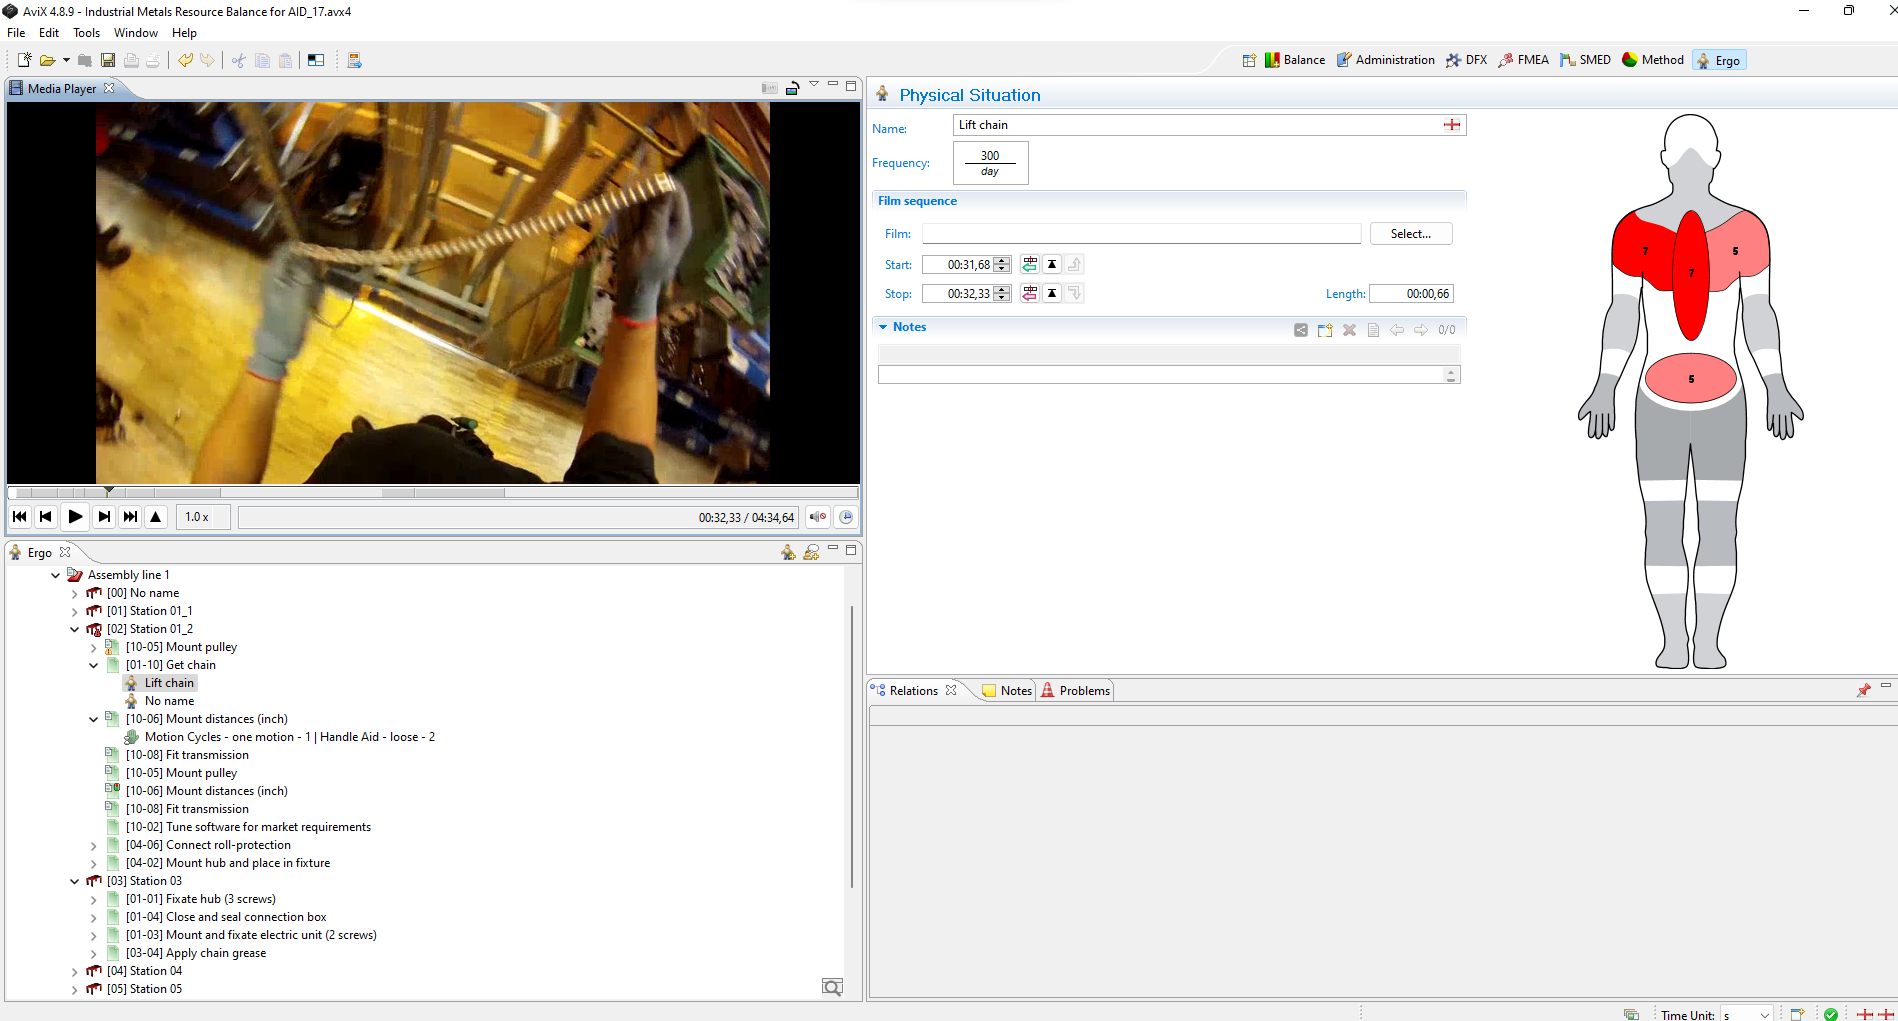
By clicking on a Physical situation in the Ergo view, its editor will open. The assessment, using the Borg CR-10 scale, is performed by clicking on the body part where the operator experiences strain, and setting the strain level.
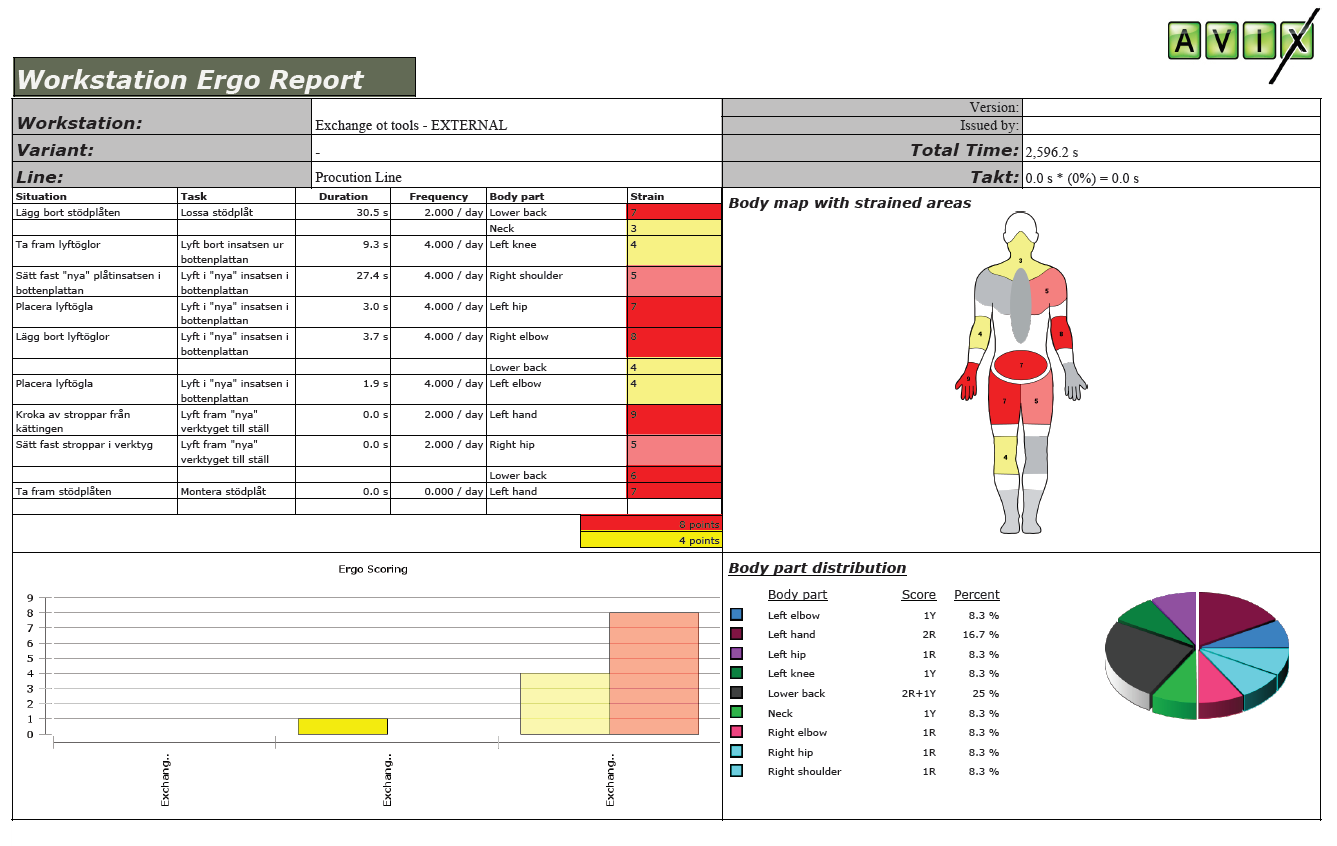
Follow-up – Workstation Ergo report (physical situations)
Currently, one report exists within AVIX Ergo: Workstation Ergo report. It will give you a quick overview of the existing physical situations on the workstations of a production line.
This report can be printed by selecting one production line in the Ergo tree, and running the Print action (File->Print...). It is also possible to select the Workstations of interest directly.
The report will contain one page per Workstation that included any physical situations. Apart from the report header, each page contains four main quadrants: The upper left quadrant simply lists all the situations within the workstations, with a summary of the red and yellow points for the whole workstation. The upper right “body map” quadrant shows the “worst case” per body part. The bottom right quadrant shows the distribution per body part (simply based on the number of occurrences that a certain body part was considered to be “strained”). The bottom left quadrant, finally, simply shows the Ergo score of each workstation. This quadrant will remain the same on every page in the printout, with a little highlight on the current station.
Scoring and classification
As we’ve seen in the report screenshot above, the situations are yielding “points” (red and yellow). The points are used in the upper left quadrant (the summary of the situations for the workstation), in the bottom right quadrant (score per body part) and also in the bottom left quadrant (score for each workstation).
The current scoring system settings can be viewed on the “Scoring and classification” preference page, found under “Window->Preferences...”. In the picture below, we see that the default scoring is basic: every occurrence of a “red” strain value gives one red point etc.
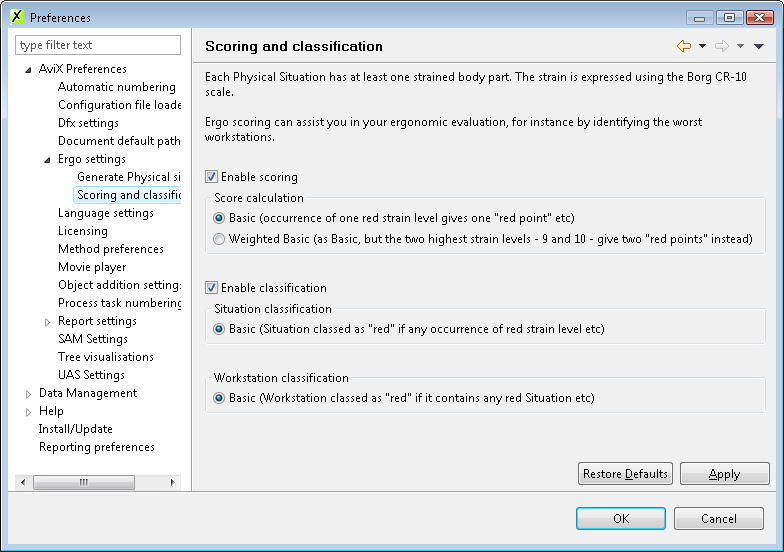
The classifications are used to “decorate” the workstations in the Ergo tree with little ergonomic warning symbols. They are equally simple: if any situation under the workstation is considered as “red”, the workstation will also be considered red.
This system is extendable, so it is easy to implement more sophisticated scoring and classifications in AVIX Ergo.