DFX analysis
Performing the DFX analysis
Watch video: DFX at part level
Watch video: DFX at product level
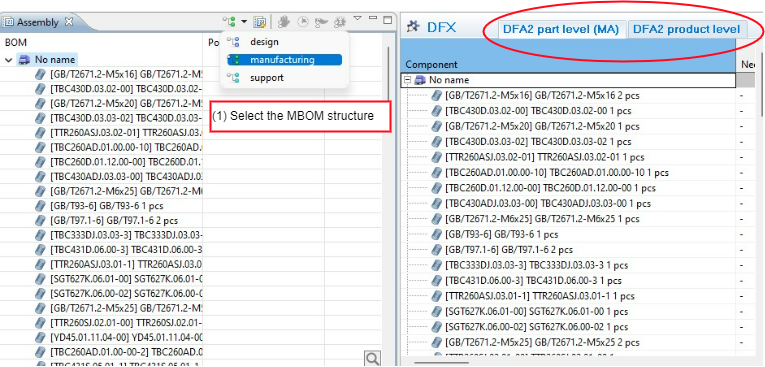
To start working with the DFX analysis is straight forward – Select the desired M-BOM structure and the DFX palette will be available. You can now choose between the DFX at part-level or product-level.
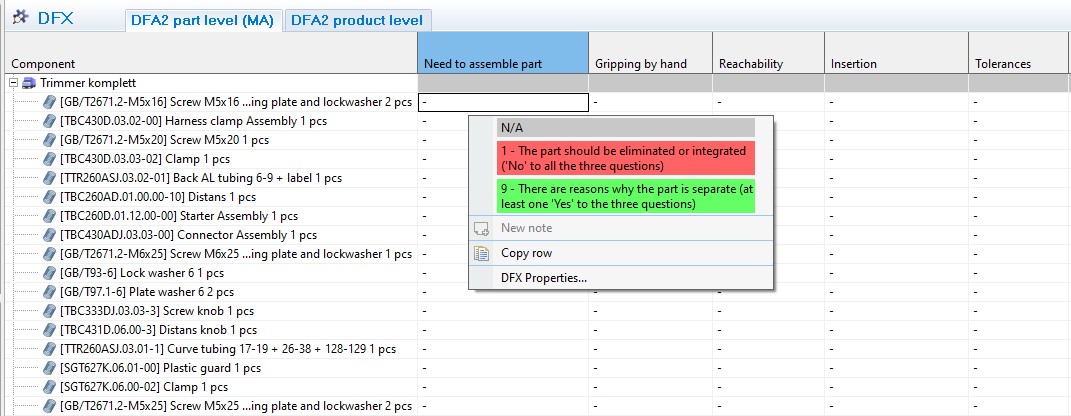
Without going further into the specifics about the actual DFA2 methodology, the picture above displays the following interesting information:
- The analysis editor has a grid layout, where the BOM structure (well-known from the DFX view) appears in the first column)
- The remaining columns in the grid are the DFX aspects in use, as well as two “result” columns which display specific score results.
- Analyzing a component for a certain aspect is carried out in one of the grid cells. This is done by the right-click menu, or simply by using the keyboard (e.g. by typing 9 for setting the highest score).
- Selecting N/A (Not applicable) is indicated by a grey cell.
- The Help view (below), being in sync with the cell selection, displays the DFX aspect documentation
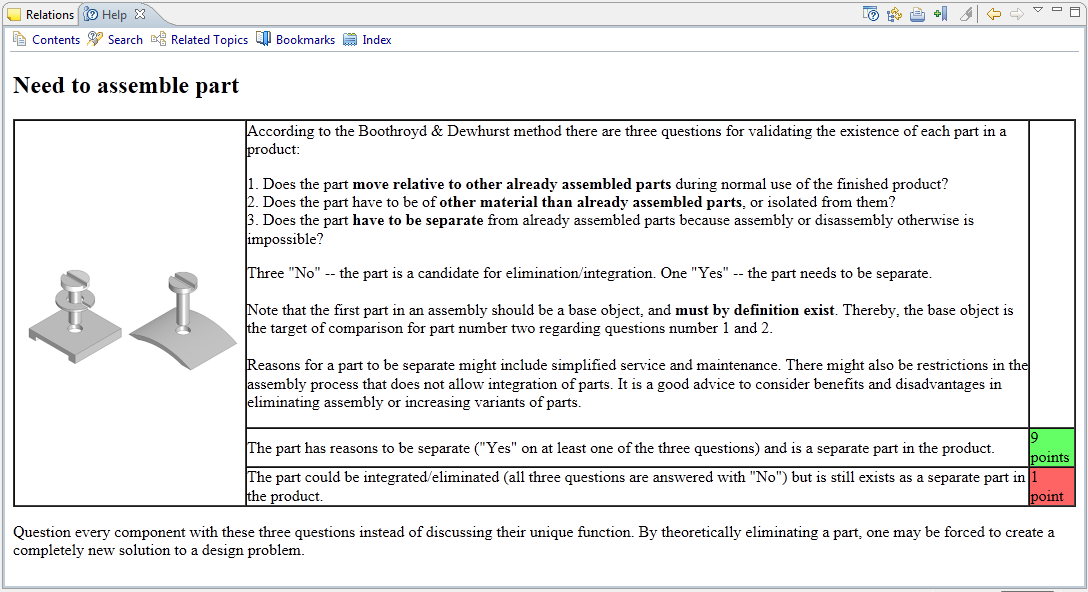
"Detaching” the Help view – thus making in floating – frees up available screen space.
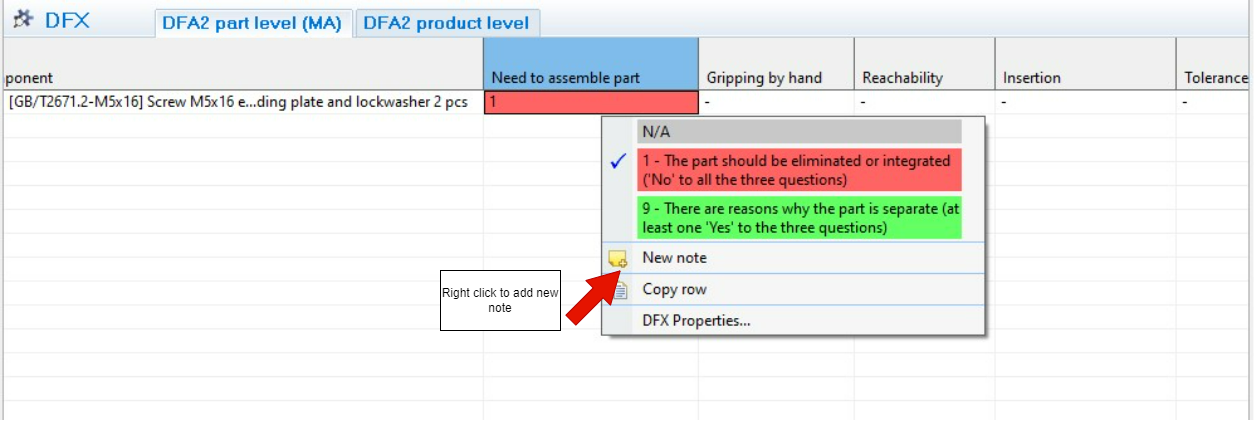
Note/action follow-up information: It is of significance for the follow-up work that the discussions and comments that typically arise during an “analysis session” are captured. This is, of course, even more important in the case of a problem: when the score of 1 is set for a Component, it is advisory to document the cause and what actions are to be taken. All this can be achieved by adding a “Note” (from the right-click menu in the grid), and entering the relevant information.
Changing the used aspects for a DFX analysis
In the lower left corner of the DFX analysis editor, one can switch to the Properties tab to view the properties for the current analysis.
Apart from general properties (i.e. version, responsible, participants and description), the “Aspect specification” section allows the analyst to specify which aspects or aspect groups that will be used for the analysis.
Note that the set of used aspects can be changed at any time, since removing aspects does not delete any existing data. This enables that certain aspects can be “hidden” or filtered out effectively, if the current focus during the analysis is on other aspects.
Changing the default set of aspects per DFX type
Watch video: SettingDFX theat preferencespart level
Watch video: DFX at product level
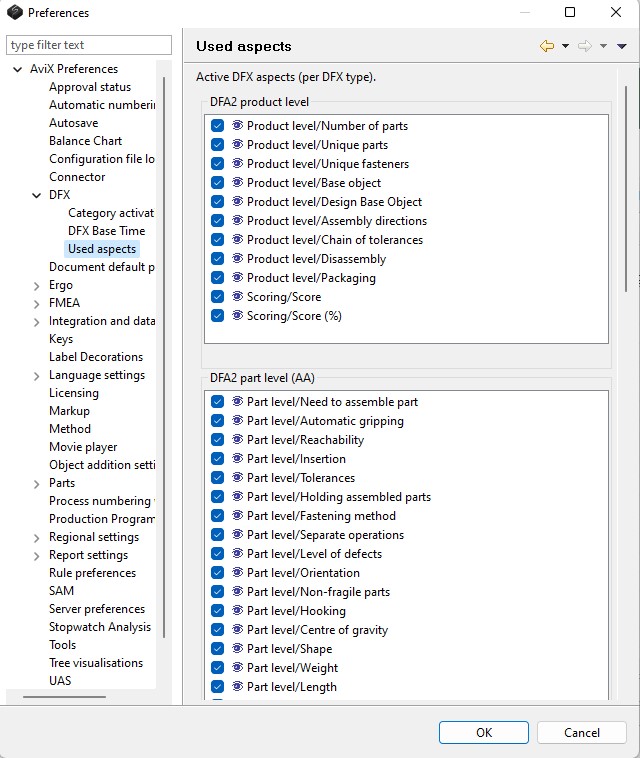
The previous sub-section described how to change the set of used aspects for an existing analysis. If one wants to change the default set of aspects (which is applied when an analysis is created), it is easily achieved. By opening the preference dialog (Window->Preferences...), the aspects that should be used for new analyses can be defined per DFX type.
In the picture below, the default setting of “Use all aspects” has been changed to “Manual assembly” for the DFX type “DFA2 part level”.
Follow-up – Result and Reports
There are currently two interesting reports that can be printed after completing a DFX analysis: the generic DFX report and the Notes report.
The DFX report, which is printable for all types of DFX analyses, is possible to print either by selecting a DFX analysis in the DFX view, or when the DFX analysis editor is open. The print action is accessible either via the print button in the main toolbar, or via “File ® “Print”.
The Notes report (a standard report available not only for the DFX module) is preferably executed by selecting the top-level Component of the BOM that has been DFX analysed. This will include all Notes for every Component below the top-level one. Once again, select Print but this time select the Notes report. For information about options concerning sorting and filtering when printing a Notes report please see Guide to Notes report under help in AviX.
The Result view can be used to display tabular results for one and more DFX analyses. It’s major benefit is the ability to compare two different analyses (“analysis of original BOM” v/s “analysis of re-design”; see also the section below) and to sort the columns in order to find the “worst” components within a BOM.
DFX revisited – comparing two designs
After the initial DFX analysis of a certain BOM, different activities within the different disciplines (e.g. purchase, design) might have resulted in a proposed re-design of a product. It is thus a logical step to compare the “DFA index” for the original BOM with the re-designed one.
A few words need to be mentioned regarding the current support of several analyses on the same structure in AviX DFX. At present, the “analysis data” is stored per Component rather than per Item. This means that if one creates a new DFX analysis of the same type for the same BOM, it will by default display the same analysis data that has been created earlier for the original analysis.
This means that it is discouraged to create another DFX analysis of the same type for the same BOM. The recommended way is to:
- Create a new top-level Component (i.e. “Complete product re-design”) as well as its source Item
- Copy the original sub-Components (i.e. the children of the “Complete product”) and Paste them within the new “Complete product re-design”
An alternative approach is to import the re-designed BOM from Excel (see also the section ““Matching” when re-importing items and components” above for more information).
Now a “re-designed” BOM exists. The next step is to create a new DFX analysis for this new BOM, and perform the analysis. The two different BOMs can in the end be compared with each other, for instance by using the Result view.
A better starting point for the DFX analysis of the re-designed product can be to copy the DFX analysis data from the “original” structure onto the re-design. If many assemblies haven’t changed, a lot can be gained from this copy approach.