Security system - the basics
When starting AVIX for the first time, before any security system or users has been created, you will log in as "Guest". Guest will have permissions to design the security system itself.
AVIX comes with a default security system to help getting started. It includes a set of organization, roles, users and assignments. All of this can be used as is, but will probably not fit the need completely. And therefore more likely to be deleted and replaced with a manually crafted design.
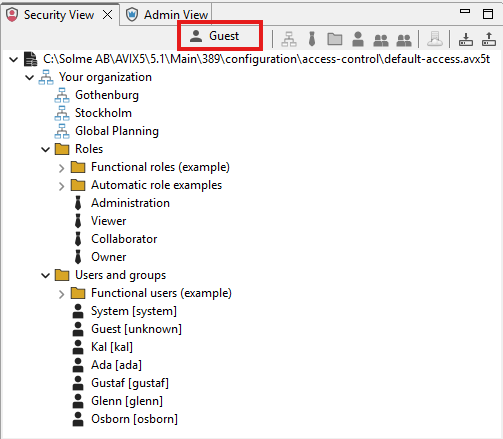
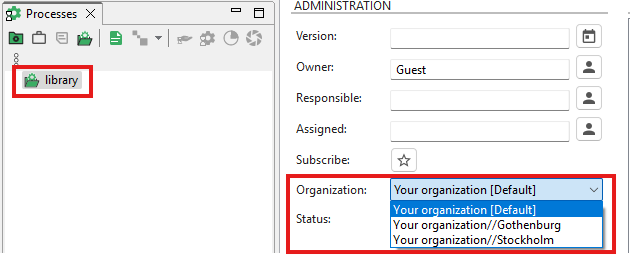
Picture 1: Guest is logged in to the default security system.
1. Create organization:
Is done by clicking the create organization button.
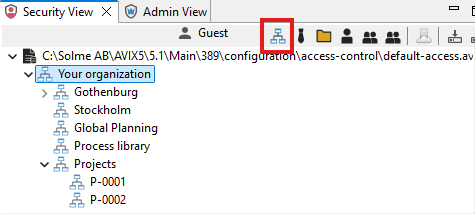
Organization entities can be created in multiple sub-levels and parallel-levels. This structure does not need to reflect your actual organizational structure, it may be that you want to control access to certain data in AVIX (e.g. a Process library or specific projects).
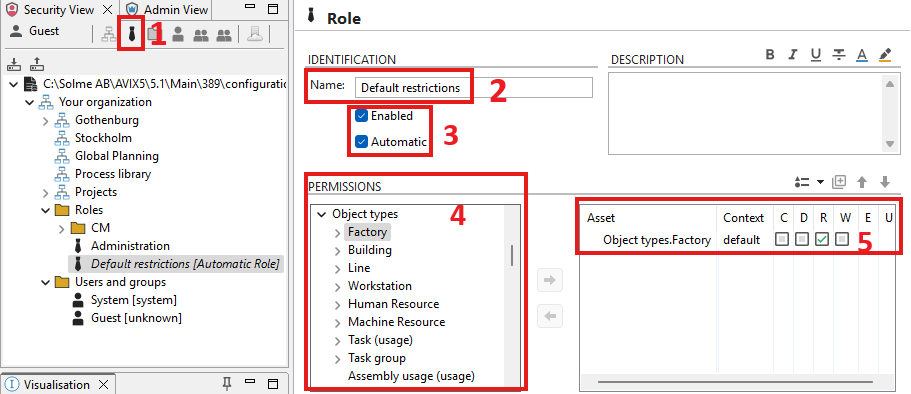
2. Create role:
- click the create role button
- Give the role a name
- Allow the role to be enabled/disabled (maybe disable the role until it is needed). Check the "Automatic"-box if the role should be applicable for all users (despite specific permissions given later to the user).
- Select Assets to be part of the role.
- Select permission for the asset; C=Create, D=Delete, R=Read, W=Write, E=Execute, U=Use.
3. Create user:
- Click the Create user button.
- Type user credentials (User name is is the minimum information required to create a log in).
- Select Organization and Role the user should be assigned to (user can be given multiple assignments).
- Click the Assign button.
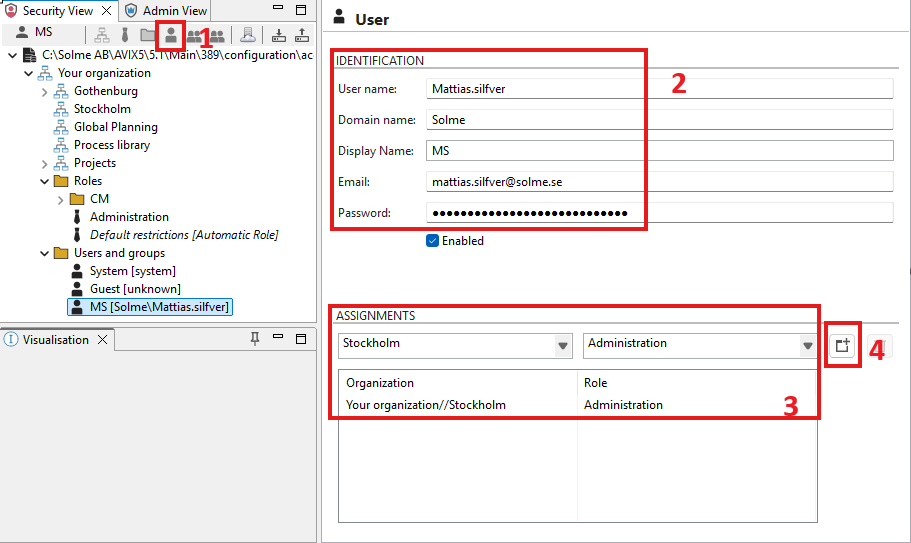
4. Assign organizational belonging in AVIX
Assign organizational belonging to any AVIX folder, factory, building, line or work station.
Note! This step is is what makes the behavior of AVIX to act according to the settings in the security system.