PREREQUISITE: Create Access Control db Storage
This chapter instructs you how to create a database storage that contains access control entities, e.g. a set of Organizations, Roles and Subjects (Users and Groups). This db storage can be referred by other storages, thus in effect providing access control to objects and functions in AVIX.
We will, step by step, describe how a server is installed and configured to use a local h2 database. This db will be configured to contain two so-called repositories, "avix" and "admin". Repositories are basically containers of storages.
We will make use of an AVIX5 application/client to perform some of the necessary tasks.
Preparations
INITIAL SERVER SETUP
INSTALL AVIX SERVER Installation media
Download the installation media, the server zip archive. If you don´t have a download URL, ask your contact at Solme AB to get one. The downloadable unit ismay be entitled "se.solme.avix.server.product-win32.win32.x86_64.zip" or similarly.
Note March 14th 2023: Use "master" build #1073 or later!
Unzip zip Archive
Unzip the server zip file at the host where you intend to install it.
Avoid white spaces in the path!
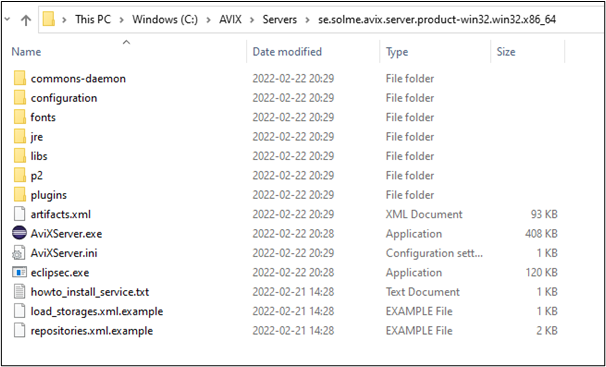
The unzipped content will look like this:
Repositories.xml file
Make sure to create a file called "repositories.xml" in the root directory of the installation. The example content below uses embedded h2 db. (In a real deployment scenario, you will likely use a professional DBMS e.g. MS SQL Server, Postgres etc)
<?xml version="1.0" encoding="UTF-8" standalone="yes" ?>
<repositoryConfig>
	<!-- h2 repository example (self-hosted by the AVIX server) -->
	<repository name="avix" type="se.solme.avix.server.cdo.h2" databaseName="avix"/>
	<repository name="admin" type="se.solme.avix.server.cdo.h2" databaseName="admin"/>
</repositoryConfig>
START SERVER
In a production deployment scenario, you would install the AVIX5 server as a service at this point and start it. For testing purposes however, it works just as well to simply start the server application by running its executable.
CREATE ACCess control storage named "ac"
We will use the AVIX application (client) to create some db data.
INSTALL AVIX APPLICATION
The installation media may be called "se.solme.avix.application.rcp.product-win32.win32.x86_64.zip" or similarly. Unzip this on your computer.
As with the server, make sure sure that it is a "master" build #1073 or later (writing this on March 14th 2023).
CREATE the access control storage named "ac"
Start the AVIX application/client. (Below, we are assuming that the server and application are running on the same Windows machine. Thus, "localhost" is used. It is also assumed that you have a license to run the AVIX software. )
Connect to the running AVIX5 server using "localhost:45500" and create your first storage. Accept the name "New storage", and open the storage.
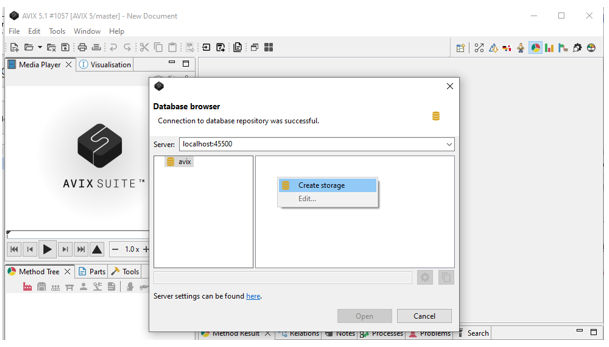
By default, new storages are using the “Local” access control principle. Change that to “Storage URL” , and click the “…” browse button:

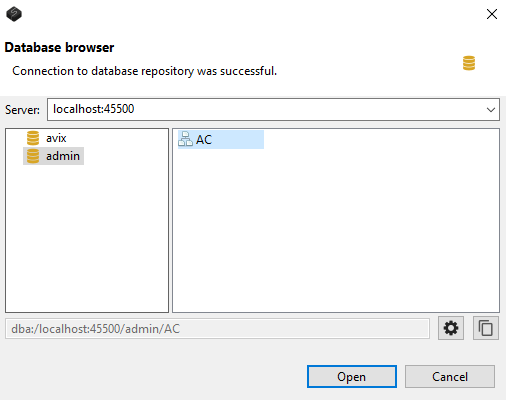
In the “admin” repo, create a new storage and name it “AC”. Finally click on “Open”:
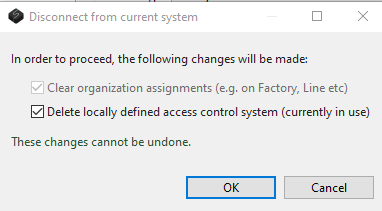
Click “Apply”, and accept the suggestions in the “Disconnect from current system” dialog that appears.
Unfortunately, you now need to close the storage “New storage” and re-open it again. (This is due to caching mishaps, and will be fixed in forthcoming AVIX application versions).
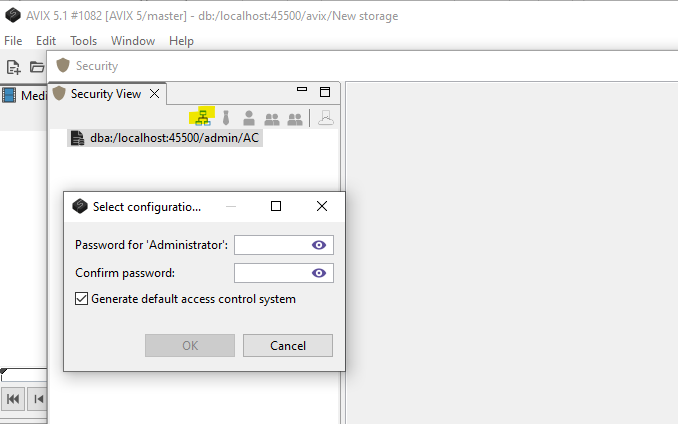
While in "New storage", open the Security view (Help->Open Security). It will be empty, but you should be able to click on the create organization button. Do that, and make sure to set the password for the “Administrator” user. Remember this password, or enter it in your password manager of choice.
You can accept to generate the example system that is suggested.
At this point, we will close down the AVIX storage, and also close down the AVIX application.
load_storages.xml file
Finally, make sure to create a file called "load_storages.xml" in the root directory of the installation. This file informs the server on startup, which storages that should be loaded. It should have the following contents to load the AC storage that haswas beencreated created:in the prior step:
<?xml version="1.0" encoding="UTF-8"?>
<load_storage_config>
	<load_storage storage="dba:/localhost:45500/admin/AC" workspace="AC"/>
</load_storage_config>
You will need to restart the server for the load_storages.xml file to be processed.
Install as Windows Service
Open a command prompt with administrative privilegesPressWindowskey to open the Start menu. Start typing "cmd" to get Command Prompt application to appearRight-click and "Run as administrator"
In the opened Command prompt, navigate to the unzipped AVIX server directoryTip: use thechange directorycommand. Example: "cd.." to move one step up. "cd temp" to open a directory called temp.Tip: The command "dir" will display contents of current directory.
Assert you are in the root directory of the AVIX server. Using the example screenshot from the "Unzip" section above, the "C:\AVIX\Servers\se.solme.avix.server.product-win32.win32.x86_64" directory.Install the service, by running a batch script file:Type:commons-daemon\register_service.bat(tip: start typing ”co..” and press TAB) Press "Enter" to run the installation script.


Verify service installation
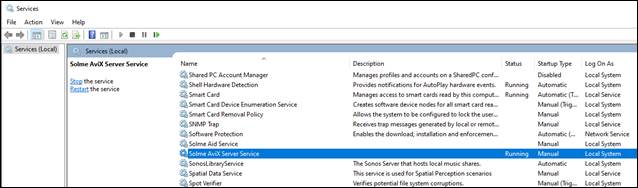
Open Windows Services manager. Locate the "Solme AviX Server Service":
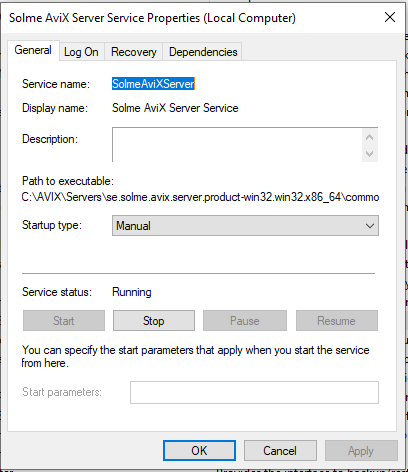
Verify that the service is running the AVIX server you just installed: Right-click and select "Properties":
Verify server installation
Check that ports are open (by default TCP 2036 and 45500)
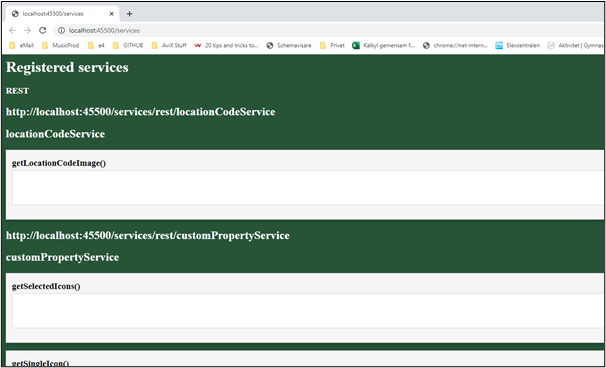
In case you are working on the host where the server is installed, try: http://localhost:45500/services
If working as intended, you should see something like this: