
Configuration: Postgre SQL set up
This document guides IT administrators through setting up a dedicated PostgreSQL database instance for use as a database repository for the AVIX Server.
Overview & Prerequisites
Before configuring AVIX Server, the database engine must be installed, configured for network connectivity, and populated with the target database schema/owner. This table demonstrate configuration properties and values from the XML configuration file /repositories.xml at the root of the AVIX Server installation:
| Parameter | Configuration Property | Example Value |
| Host Address | serverHost |
|
| Port | portNumber |
|
| Database Name | databaseName |
|
| Database User | databaseUser |
|
| Password | databasePassword |
|
| SSL Connection | useSSL |
|
1. Engine Installation
Windows
-
Download the official PostgreSQL Interactive Installer from EDB (see https://www.postgresql.org/download/windows/ and https://www.enterprisedb.com/downloads/postgres-postgresql-downloads )
-
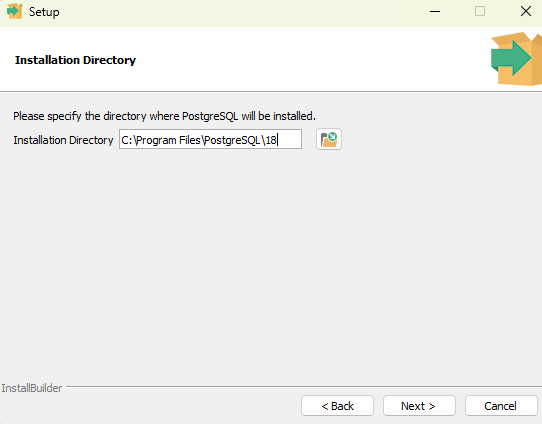
Run the executable and accept default paths
-
-
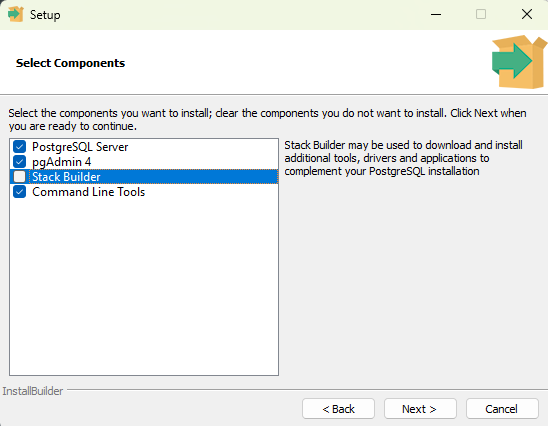
Select PostgreSQL Server, pgAdmin 4, and Command Line Tools.
-
-
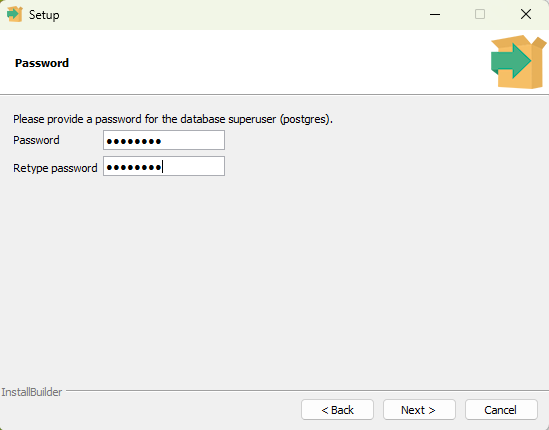
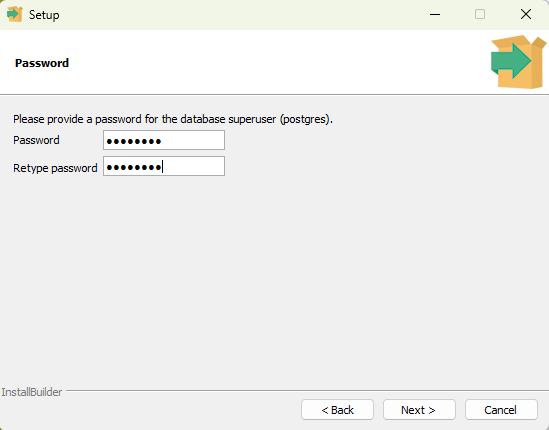
Specify a master password for the
postgressuperuser during setup.-
-
Take note of the password!
-
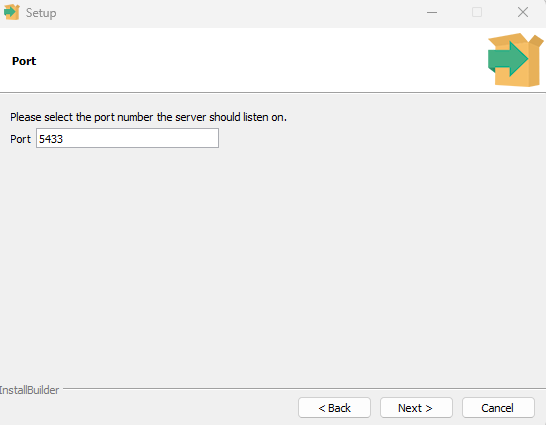
- Specify the port of the Postgres server:
-
Linux (Ubuntu / Debian)
sudo apt update
sudo apt install -y postgresql postgresql-contrib
Linux (Red Hat / Rocky / Fedora)
sudo dnf install -y postgresql-server postgresql-contrib
sudo postgresql-setup --initdb
sudo systemctl enable --now postgresql
2. Network & Authentication Configuration
By default, PostgreSQL only accepts connections on localhost. Perform these steps if AVIX Server runs on a separate machine:
Edit
postgresql.conf
-
Windows Location:
C:\Program Files\PostgreSQL\<version>\data\postgresql.conf -
Linux Location:
/etc/postgresql/<version>/main/postgresql.conf(Debian/Ubuntu) or/var/lib/pgsql/data/postgresql.conf(RHEL)
Set the listen address and verify the port:
listen_addresses = '*'
port = 5432
Edit pg_hba.conf
In the same data directory, add an authorization rule for the AVIX Server host IP:
# TYPE  DATABASE        USER            ADDRESS                 METHOD
host    all             all             <AVIX_SERVER_IP>/32     scram-sha-256
Restart Service & Firewall
-
Windows: Restart
postgresql-x64-<version>viaservices.mscand allow TCP port5432in Windows Defender Firewall. -
Linux:
Bashsudo systemctl restart postgresql # Firewall (Ubuntu UFW) sudo ufw allow 5432/tcp # Firewall (RHEL firewalld) sudo firewall-cmd --add-port=5432/tcp --permanent && sudo firewall-cmd --reload
3. Database & User Creation
Log into psql using the postgres administrator account:
# Linux
sudo -i -u postgres psql

# Windows (SQL Shell / CMD)
psql -U postgres
Windows: Should the PostgreSQL bin directory not be in your system's PATH environment variable, instead use the full path:
# Windows (SQL Shell / CMD)
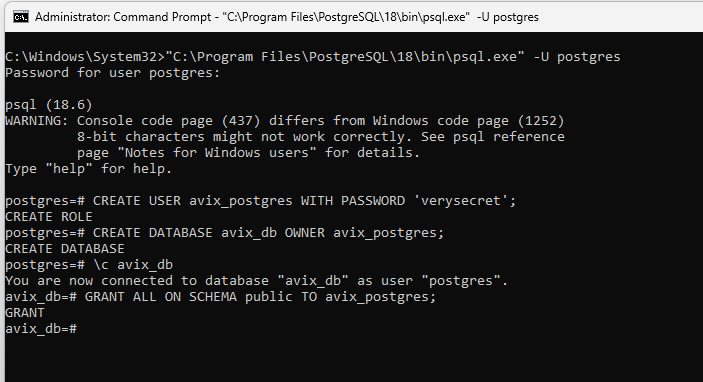
"C:\Program Files\PostgreSQL\18\bin\psql.exe" -U postgres
Execute the following SQL commands to prepare the environment.
Make sure to set the password of your choice (instead of 'verysecret'), and store it in a safe place.
-- 1. Create dedicated application user
CREATE USER avix_postgres WITH PASSWORD 'verysecret';

-- 2. Create target database owned by the new user
CREATE DATABASE avix_db OWNER avix_postgres;

-- 3. Connect to the new database   (ensures no permission errors occur when AVIX Server connects and table structures are created)
\c avix_db

-- 4. Grant schema-level permissions (required for PostgreSQL 15+)
GRANT ALL ON SCHEMA public TO avix_postgres;
Example:
4. Verification & AVIX repositories.xml Integration
Connection Verification
Test connection from the machine hosting AVIX Server prior to service launch:
psql -h <serverHost> -p 5432 -U avix_postgres -d avix_db
XML Configuration
Update repositories.xml on the AVIX Server host to reflect the database parameters:
<repositoryConfig>
    <repository name="postgre_repo"
                type="se.solme.avix.server.cdo.postgresql"
                serverHost="localhost"
                portNumber="5432"
                databaseName="avix_db"
                databaseUser="avix_postgres"
                databasePassword="verysecret"
                useSSL="false"/>
</repositoryConfig>
The name field (set to 'postgre_repo' here) is how this repository - a connection to the underlying db - will be presented in AVIX client UI.
5. Activating SSL
Server-side setup (postgreSQL)
To enable SSL on PostgreSQL, IT admins need to perform three basic steps:
Obtain or Generate Certificates:
A Server Certificate (server.crt) and Private Key (server.key).
Place Keys in Data Directory:
Move them to the PostgreSQL data directory (e.g., C:\Program Files\PostgreSQL\18\data\).
Permissions note: On Linux, server.key must have strict permissions (chmod 0600).
Enable SSL in postgresql.conf:
ssl = on
ssl_cert_file = 'server.crt'
ssl_key_file = 'server.key'
Enforce SSL in pg_hba.conf (Optional but recommended for security): Change host to hostssl so non-encrypted connections are rejected:
# TYPE    DATABASE        USER            ADDRESS                 METHOD
hostssl   all             all             <AVIX_SERVER_IP>/32     scram-sha-256
Java/AVIX Server Side
When Java establishes a JDBC connection to PostgreSQL with SSL requested (ssl=true ), behavior depends on the certificate type:
CA-Signed Certificate (Public or Internal CA): If the PostgreSQL server uses a certificate issued by a recognized Certificate Authority (CA) already trusted by the Java Runtime Environment (JRE) or your enterprise domain, it works seamlessly with zero client configuration.
Self-Signed Certificate: If a self-signed certificate was generated, Java's security manager will block the connection by default because it doesn't trust the unknown CA (PKIX path building failed).
Example
In the below example for MS Windows
Step 1: Generate a Local Self-Signed Certificate
Open PowerShell as Administrator and navigate to your PostgreSQL 18 data directory:
cd "C:\Program Files\PostgreSQL\18\data"
Run these three commands using PostgreSQL's bundled OpenSSL executable:
Generate Private Key:
& "C:\Program Files\PostgreSQL\18\bin\openssl.exe" genrsa -out server.key 2048
Generate Self-Signed Certificate:
& "C:\Program Files\PostgreSQL\18\bin\openssl.exe" req -new -x509 -days 365 -key server.key -out server.crt -subj "/CN=localhost"
Restrict File Permissions (Crucial on Windows): PostgreSQL will refuse to start if the key file is accessible by other non-admin accounts:
icacls server.key /grant "SYSTEM:F" "Administrators:F" /inheritance:r
(This creates server.key and server.crt directly in your data folder).